Sections

Showing posts with label beadsbycelleste. Show all posts

Tuesday, September 23, 2014

Prepping For My First Craft Show Booth Has Begun!!!

Hey guys!

I know it's been a loooooooooong time since I've posted on here, but I've been focusing a LOT of my energy on my day job. I am working with the Director of Business Process Improvement to build training documentation for my company as we haven't had a trainer or training team in quite awhile. My ultimate goal is to become said Trainer and be in charge of the training and documentation for the company, but it's taking a lot out of my mental time to be able to handle the tasks as a pilot training team lead in addition to doing my actual title the rest of the day. 

On top of that however, I have gotten a 2nd job at the place we (nearly) all know and love here in the states, Joann Fabric and Crafts, for many reasons:

  • Employee discount (duh!)
  • Happy stress compared to some of the bad stress at my desk job
  • People interaction I don't get sitting at a desk, sometimes talking to people on the phone and my co-workers
  • The moving around instead of just going home and sitting on my butt like normal
  • Learn new things all the time about crafts and supplies
  • Get paid to talk about something I LOVE doing already anyways!
  • Opportunity to attend classes and learn even more
  • First dibs on occasion on some of the AWEsome fabrics we get in
Anywho, I've only been doing that a month now, but have already have it benefit me in my little wanna-be craft business! You see, I could never really figure out where all the small craft shows and fairs were happening, how to get in touch with the coordinator to get a booth and especially didn't know anyone else that was going to these things!

A couple weeks ago however, I was cutting a bunch of fleece for a woman and she was chit chatting to her friend about spending her "craft show funds" on this fabric. So, I did what any intelligent person would: I asked her, "Um, soooo what craft shows would you happen to be talking about?"

She and I had a little conversation about it being a craft show a few months ago but also about a show coming up on 11/1/14 in my city and when I told her, "See, I can just NEVER find out about the ones that DON'T cost me $200+ for a booth!! How do you find out?!" she simply replied, "Oh, you have to start going to the shows to find out about more......(cue my face freezing in shock!)....I can email you the flyer if you'd like..?" I had to refrain from jumping up and down as I excitedly said, "Yes! That would be fantastic!! Thank you!!"

And there you have it folks! I have the information, have talked to the coordinator, gotten the vendor application form just about filled out and now all I have to do is send it in with the measly $50 it'll cost me for a full booth of 100 sq ft and TA-DAAA!!! I'll be attending my first craft show as a vendor EVAR!! 

Only problem is now... making sure I plan out whatever displays I want to use, I've talked with a friend about sitting at the booth with me......... UH OH!! I don't actually have that much stock to put out!!

I guess that just means I will be taking every opportunity (except for this past Sunday as it was my first weekend day off in a MONTH so you bet your patootie I sat there watching tv and napping all day!!) to make what all I can!!

On the roster/application I've got:
  • Jewelry
  • Clutches
  • Purses/bags
  • Scarves
  • Perler sprites
  • Miniature canvas art
  • Embroidery hoop art - 3" - 4"
I already have all the jewelry I've made through the years without selling, and I have the clutches that didn't sell when I had that consignment before, plus the displays I'd made for both.... Now I just have to make some of the other items I listed up there and figure out displays, enough to fill what I can of a 100 square feet space!

This should be....easy?.........oh goodness.....

Friday, October 18, 2013

Sad News About the Consignment

I know I've been pretty MIA lately guys, I apologize.  Work yet again continues to get in the way. I hope to really get my butt in gear this weekend to finish the Halloween prop I teased you with before, but also to work on a bit of the other things I have planned.

I wanted to put up a quick post however to let you know that Tuesday was a sad day for me....

I emailed the woman in charge of the shop I was on consignment with, Easely Amused, and she let me know that they've decided to go full on with home decor items in her lobby only going forward. This means I had to go ahead and pick up my stuff to bring it home as they're accessories.

I dreaded actually going so I did wait until the last day she'd asked me to have it out by, but at least once I got there, it wasn't nearly as awkward as I worried it might be (she's a really really nice gal). We chit chatted about how things are going, and when she asked me about plans for Halloween, I got to brag a little on what I've worked on so far and what my plans will be.

I am sad that it didn't last too long, but I am glad I at least made a few sales and I appreciate her allowing me to use space in her lobby to display my items.

I'm not sure if I'll try to look for another place to display my items just yet however as this time of year starts to get pretty hectic with family plans and work trying to get what it can before people are gone for the holidays. On top of that, I applied for a manager position here and am waiting to hear back about an interview and then we'll have to see what happens from there! If I get it, I'm not entirely sure what that'll mean for my free time or sanity, but I am thinking maybe it'll mean I'll HAVE to do some crafting here and there to keep my sanity or to relax on weeknights or weekends.

Hint: I'm kiiiiinda into making knitted scarves again and have already made my new one for the season!! That post to follow.... ;)

Anywho, thanks for sticking around and bearing with me and as always,...

Craft ya laters!

Friday, September 13, 2013

2013 Halloween Prop #1 - WIP Pics with Full Reveal Later!!

Hey guys!! I know I've been a little sparse of late, but day job has been kicking my butt lately!! It's busy while I'm at work, and then by the time I get home, I'm just pooped!!

I did start on a Halloween prop for this year however this last weekend that I can maybe tease you with for a little bit.... ;)

Testing for doll size/fit.....


Boyfriend suggested I use a bigger baby so it'd look like it was jammed in there as opposed to me wanting to have enough room for it.... don't want the baby to be able to get up after all, do we?!?!! Mwahahhaa....

Starting to work on ghouling up the baby doll.... don't mind the pipe insulation pieces, that's for another prop I will be working on soon....


A little close-up of the baby in the painting process...


I know, it's not much and my pictures are le suck, but this is about all I've really had time or energy to do!! This weekend I hope to get this as well as a few more things done as I'm focusing tomorrow at least on this month's Craft Day - Halloween Themed!!

I'll post all the pictures (including these again) once the whole thing is complete and show you guys later what else I'm working on/have gotten done for my other props!!

Craft ya laters!!

Friday, August 23, 2013

The 30 Minute Challenge

The other night, my boyfriend and I were watching tv together for a few hours. I realized it was about 8 o'clock however, and needed to work a little and make at least one of the things I have people wanting to pay me for. I told him I needed to work for a bit and his response of course was, "Ok, see you in an hour, if even." I simply stated, "I don't need an hour, I can work for only half an hour and be back in here!"

Needless to say, he didn't believe me so I made sure when I went to my craft room, to take special note of the time. I didn't do a clutch as I know for a fact these take about an hour, maybe an hour and 15 minutes for me to make, so I tested myself on making a simple tablet case with no frills or bows or anything.


Wouldn'tcha know, I totally won the challenge and was back in 30 minutes to watch some more tv with him!!

He did ask me when I got back however if it would even fit her tablet, and did I check to make sure? So he made me sufficiently paranoid enough to ask her exactly what tablet she has (Kindle Fire) so that I could look up the exact dimensions to my Nexus 7" tablet and there was only a 10mm difference on top to bottom measurement! Yay!! AND she likes how it looks! 


Now I only need to finish her clutch and I'm golden!!

Craft ya laters!

Wednesday, August 21, 2013

First attempt at inchies

I've recently become aware of these things called "inchies" thanks to the craftster.org forums. An insightful post about what they are, as well as what "rinchies", "twinchies", "moos" and "rolos" are is here.

I am still trying to figure out the appeal, but in the process, I decided to make a few for myself:


A close-up for a little more detail:


I made these by cutting up an ATC card for watercoloring on into the 1"x1" pieces and once they were all created, I glued them to a piece of cardstock for scrapbooking to use as a display. I did trim it down a little so the inchies could be closer to each other instead of spread out on the whole piece of cardstock.

For something like this, I can see the appeal I suppose... it just depends on what you actually put on them or how you decorate them. These I feel were a little empty, until I put them together on the background and then they didn't look quite so 'meh'. I'm not sure about doing ones that aren't part of a collage or set such as these, but I may try a few more at some point and see what I can come up with. I especially want to try to do a themed set for my bff who loves the Firefly series/movie and the quote "I am a leaf on the wind, watch how I soar." in particular.

Even when I tried explaining to my boyfriend and the friends we had over the other night what I was doing and though why, "They're art... ya know,.. used for jewelry, to display, magnets.... things like that?" I was still a little unsure myself of why I was making them. 

I have been searching for ideas and different ways to make them, decorate them and display them and so far, I will say that Kira's blog "Oops, I craft my pants" has given me a TON of inspiration and I might try to do some of the things she's done such as:


Tiny scraps into colorful collage
Another teeny inchies book
Three bird inchies made from scraps

I really want to try something like these as some of the other ones I've seen (not going to show as I don't want to appear to be badmouthing any other artist, each person's opinion is their own and I don't want to hurt anyone's feelings from my personal feelings or opinions) are a little too cluttered for my personal tastes or I can't quite understand why they put as much clutter on the pieces as they did, etc. The ones Kira does are minimal, but colorful and cute as all get out, much more my style and taste!

I love having small-scale art and things to put up on my wall at work so that's maybe the biggest appeal for me on these guys. I do particularly love the idea of a little inchies book though, something maybe I can adapt for the months or maybe the days with no month specified type of thing...

The other thing though is that it doesn't just have to be inchies! I have done a couple of ATC cards here but only did the 2 as I wasn't sure what else to put on them at the time, but there's the whole genre of these guys with the rinchies and twinchies too:

Inchies, rinchies and twinchies!
Rinchies are round inchies and twinchies are 2" square pieces, you have a little more room on those to work on a design. But there are also trinchies (3" square pieces) and moos (basically artist trading cards, ATCs) and rolos (altered rolodex cards).

Yeah, she has some pretty awesome stuff that she's made and is sooo inspiring to me!!

Craft ya laters!!

Wednesday, August 7, 2013

First Official Double Zipper Tablet Case In Store!!

This last weekend, I got a chance to sit down and take my time working on my own double zipper case, the same design as what my friend Airon and I worked on last week, and am very pleased with the results!!


It's the same fabric as the last attempt I did but I couldn't bear the thought of making a case that might not work with a similar fabric I bought for myself with butterflies instead of flowers!!


I worked on it throughout the day but I must have only worked on it for an hour and a half or so. It's pretty basic once you get past the idea that there's 2 zippers instead of just the 1, and that you need an extra layer of batting and interior fabric...


It's pretty snug for my 7" Google Nexus tablet on the sides, but because of the extra fabric I used, it's got plenty of room top to bottom and is snug on the sides once it's in; the only really snug part is getting past the zipper, but that's ok.


It comfortably fits my tablet in the main section, and has more than enough room for my charger as well which means I'd have plenty of room to put a pair of earbuds in there also!!


You can't even tell there's a tablet AND a charger in there, can you?!

I will call Airon the guinea pig on this one though. She and I both noticed that it was a little difficult to get the zipper teeth on the front pocket's zipper lined up when sewing the layers together, and not have the fabric get stitched through with the zipper a little too open (you have to open that zipper to stitch over it and give it the new ends). I tried this though and it worked like a charm!:


It's maybe a little hard to tell, but I basically used a couple pins on both sides of the zipper to pin through the layers when the zipper was closed so that when I opened it and stitched over the open end on the left, it was still pretty much lined up to what it was when closed!

I must say though, I'm pretty proud of myself on this one as well as the last 2 clutches I have made and the last 2 pouches I've made. Why you ask? Well, it's all a matter of getting more and more used to my sewing machine, realizing little tips and tricks and just what works best for what I'm trying to do.

One of the things that I was getting a lot was knotted string within the first inch or so of stitching! I kept having to take the piece out, get the strings out of it and what was stuck in the bobbin area, and start again! I finally realized it was just the starting strings getting in my way.This was easily fixed by taping the strings down on the backside of the machine and then un-taping them after getting that initial inch or so sewn!!

The other thing was figuring out that the left side of my zipper sewing foot is the PERFECT gauge to get that perfect top-stitch taken care of!!

I may still have a ways to go on sewing skills and talent, but hey, considering where I was only a few months ago...I'm definitely proud of myself and my hard work. If you are trying to get better at sewing or even learning how, just remember that noone starts out perfect and good product comes out of practice, patience and hard work!!

This will be my first tablet case I'll put up in my online store at www.beadsbycelleste.com and I couldn't be happier to finally get one online since so far the only ones I've made as sellable quality are currently at Easely Amused.

Well, that's all for now. I will let you guys know what the next batch of clutches/cases look like as I hope you're as excited as I am to see them!!

Craft ya laters!!

Monday, August 5, 2013

New Fabric For August

I love August if for nothing else than my day job having 3 paychecks this month due to timing! As soon as this last week had started, I was planning on going to the store on Saturday to get more fabric. I am pretty pleased with what I got to work with, what about you?

This one might seem odd, but there's a totally valid explanation. No, it's not getting used for a tablet case or clutch or anything. It's most likely going to be used for a zippered pouch armband for a friend who is a fellow motorcycle rider like myself, but has a TX toll device that he'd prefer to wear in a pouch on his arm than store in his backpack or case on his bike. There will be more on this later...


I actually ended up getting a lot of this floral as when the cutting lady was undoing the fabric on the bolt, she saw that there was only 1 1/3 yd left on the bolt. They hate doing remnant packaging so they offer to give you an awesome discount on what's left if you'll just take it with your cut!

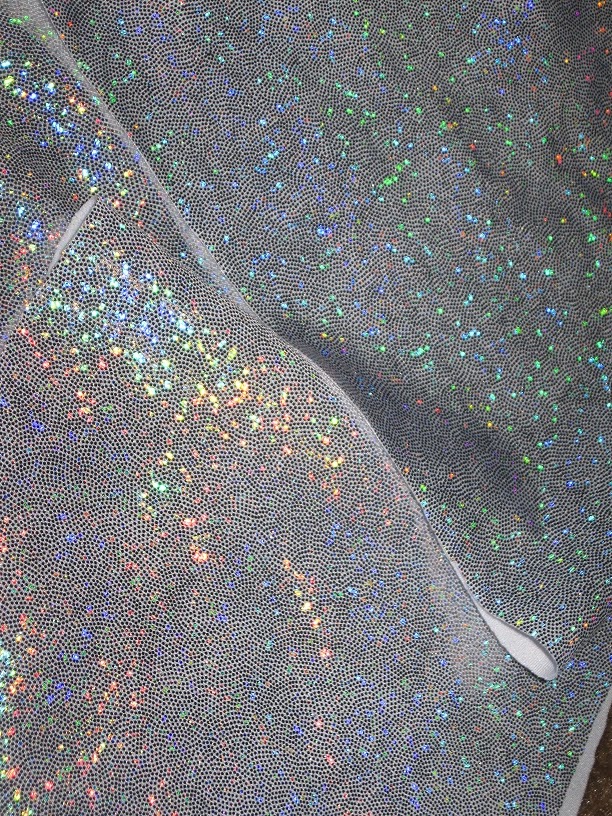
This blue floral I think would go nicely with this silver polka dot I got the other day.....

...or as a real simple pairing with black.

I personally really love this fabric and can't wait to see it made into a clutch and/or case!!


Just another variation idea to pair these together instead of just with black.


So what do you guys think? I really like these fabrics and can't wait to get to work on them. I only have to get some zippers ordered from a seller on Etsy (Zipit) that stocks YKK brand zippers at a fantastic price and I'm excited to get good brand zippers, en masse, that will match the fabric I'm using much better than the Coats & Clark ones I've had to get locally at Joanns. 

I believe I already have someone interested in the blue/silver fabric paired with the blue it's pictured with for a banded clutch, and maybe even a similar tablet case pairing!!

Keep an eye out for what's next!!

Craft ya laters!!

Saturday, August 3, 2013

First Items Sold at Easely Amused Consignment!!

You guys!! I got an email from the shop lady at Easely Amused and it's official!! I have sold items and I am out there!! Watch out Austin, here I come!!!!


Monday, July 29, 2013

Possibility of pairing up cases?

I noticed something on lunch at work today...

I made this clutch first, as a prototype to the design I've made so many of now, and use it as my regular daily purse:


And as you know, I made this tablet case for my Nexus 7" tablet this last weekend, excess space on sides and all:


But when I went to lunch and wanted to take both, this is what I came up with!:


It's pretty amazing how snugly they fit together!! Now, I can't hold the tablet case by just the top mind you, but I can hold it to my side like you would just one or the other, and not have to worry about my clutch sliding out of my hands to hold on to the tablet case!

What do you guys think? What if the clutch was made with the same fabric as the tablet case for a matched set and sold as a pairing?? Would that be something that anyone would like?

Well, off to finish my day of work so I can go home and work on some more sewing!

Craft ya laters!!

Saturday, July 27, 2013

Getting Into Tablet Case Making

I have decided to try tablet cases next as a little break from doing my clutches. I have a 7" Nexus tablet myself and have many friends who have various tablets they use and carry with them all over and I finally decided I needed a case of my own!! Though...I didn't quite get the measurements right the first time.

**Disclaimer: I apologize for the pictures being in weird angles/directions. I cannot figure out why Blogger does this or how to fix it**

It looked pretty enough:


I got a nifty fabric for the lining:


And yet, it wasn't quite big enough for my tablet:


At least I have a pouch to store my new business cards in!!


Next, I worked with my friend Airon and guided her through making a tablet case for her 10" Nexus:


Nice, pretty silver dotted fabric for the lining:


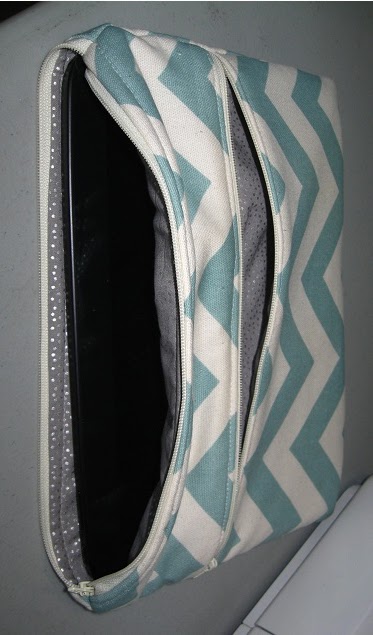
A peek inside the front pocket:


 The front pocket is plenty big enough to store your charger, earbuds, etc:


A look at the tablet inside the case:


Look at the awesome!!: 


 I decided to try again in making a case for my tablet and tried a different pattern this time as well as something a little more autumnal:


Best of all, my tablet fits in this case!!:


Although, fits is an understatement. I have about an inch of room to the sides total:


And I have about an inch, inch and a half at the top: 


I'm not too concerned though as I'm trying to decide if I really want to cut this down for a more snug fit or if I want to keep it about this size and maybe add a pocket in the front so I can slip my phone and charger in there or what. It also is enough room that instead of trying to awkwardly handle the case while my tablet is in there, the extra space is a pretty good fingerhold for actually holding the darn thing while walking around!!

There was the question of the knot around the bow though. Per the directions I was using for the pattern, the knot seemed a little big and because of this, it wasn't constricting the bow itself enough to keep the fold lines:


I know it's maybe a little hard to tell the difference, but I did a little hand stitch on the backside of the knot to shrink it down about an inch to keep the middle of the bow tighter and I feel this helped make it look much better:


 I can't wait to use this fabric some more as well as make some more tablet cases!! The next thing I do will definitely be a case in the same style as Airon's case, only, in a fabric similar to my first attempt but with butterflies instead of flowers. I'm so excited to get it done and start using it!!

Craft ya laters!!